Level Builder
Level Builder is the in-editor mesh authoring tool for creating reusable PS1-facing mesh assets. It is meant for compact level pieces, blockout-to-final geometry, and custom meshes that should live inside the project instead of only in the current scene.
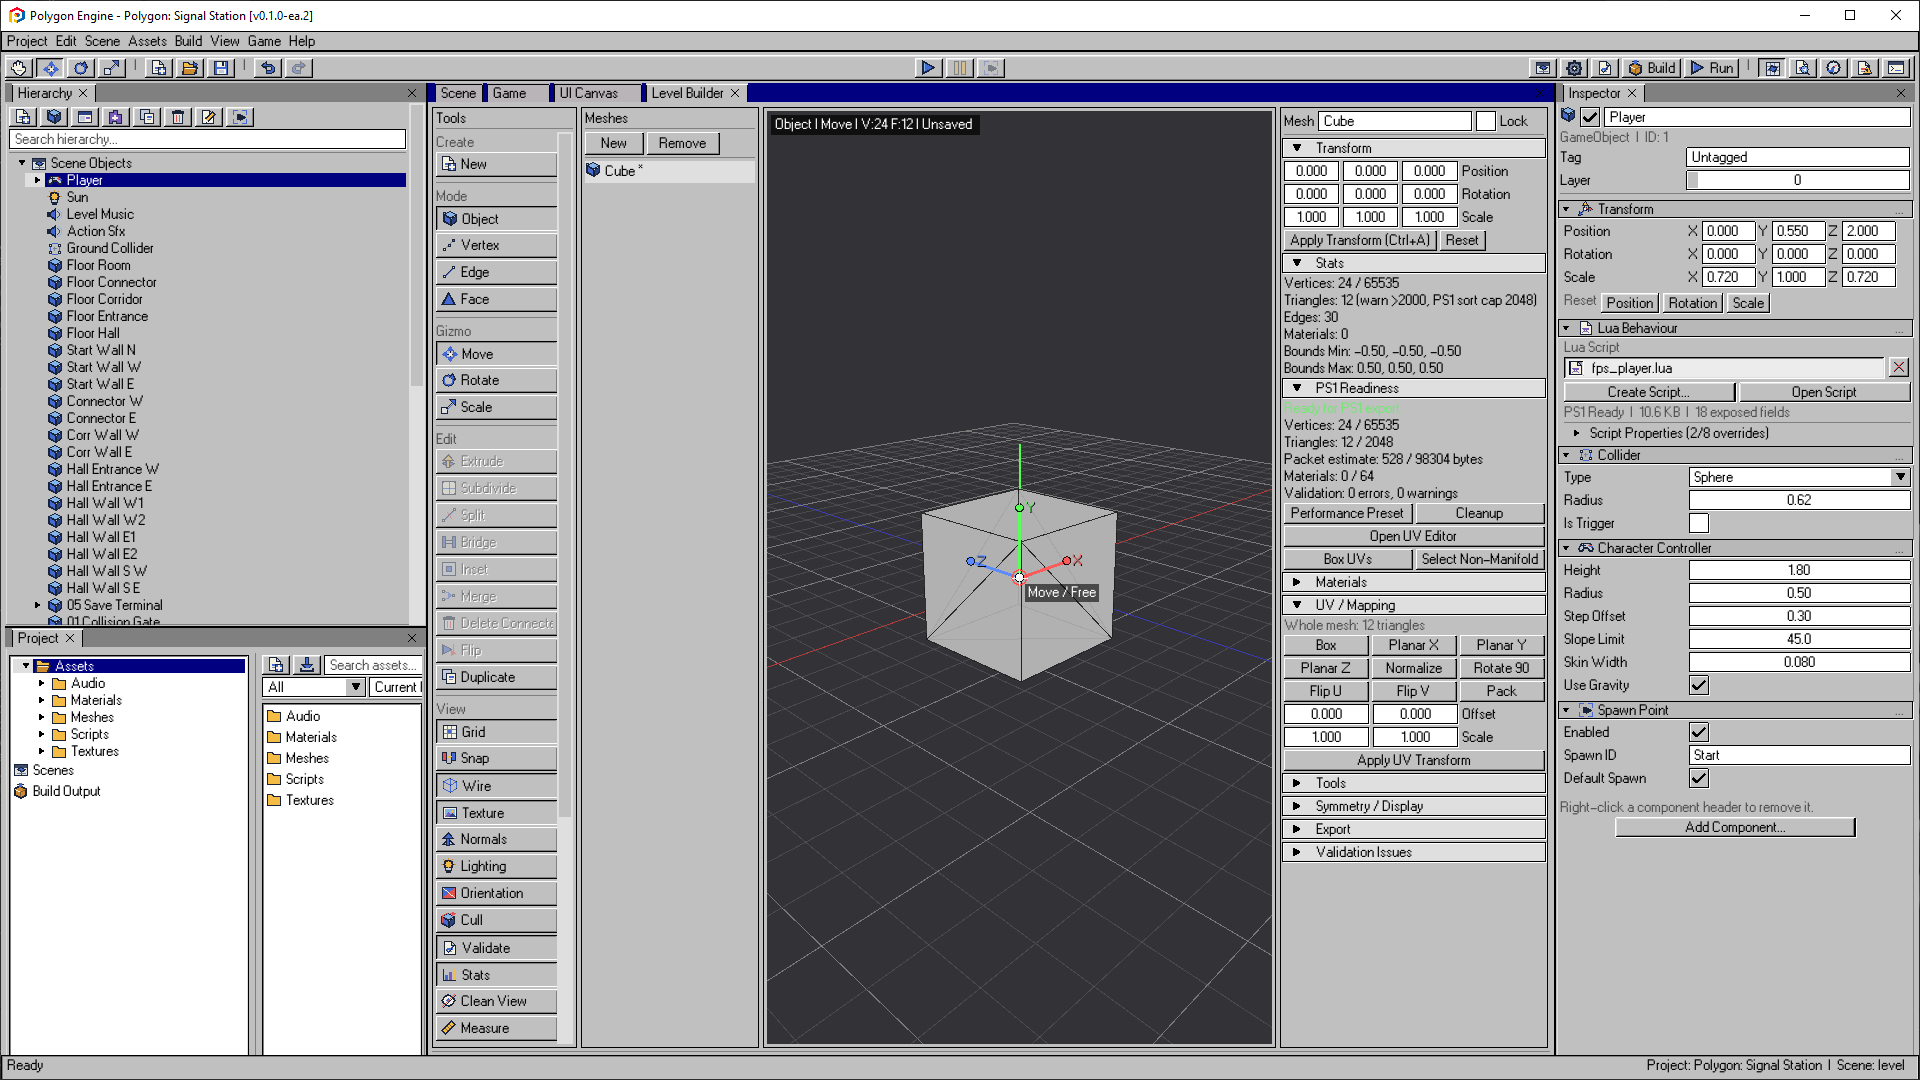
A new cube in Level Builder. Choose an editing mode on the left, manipulate the mesh in the center, and check geometry, UVs and PS1 Readiness on the right.
Open the image to view it at full size.What It Creates
When you save a Level Builder mesh, the editor writes:
| Output | Location | Purpose |
|---|---|---|
| Source mesh | Assets/Meshes/*.pmsh | Editable Level Builder source |
| Compiled mesh | Library/meshes/*.msh | Runtime mesh asset |
| Cached source copy | Library/level_builder/*.pmsh | Recovery/cache copy for the editor |
| Asset database entry | Library/asset_db.json | GUID, display name, paths, and stats |
The scene should reference the mesh through the asset database GUID, not through a raw file path.
Basic Workflow
- Open View > Level Builder.
- Click New under Tools > Create (or Create Primitive when no mesh is open). Use Load Mesh Asset to edit an existing asset.
- Edit in Object, Vertex, Edge, or Face mode.
- Open the UV Editor to unwrap, pack, preview, and validate texture coordinates.
- Use validation warnings to catch degenerate faces, long edges, non-manifold edges, T-junctions, and PS1-risky geometry.
- Click Save Mesh Asset.
- Use Place Mesh in Scene to create a scene GameObject from the saved asset.
- Adjust the generated Collider, material, transform, scripts, and gameplay components in the main Inspector.
When a mesh is saved or placed, Object-mode transform is baked into vertices and
the mesh transform is reset. That keeps saved .pmsh and runtime .msh data
predictable for PS1 export.
Primitive Types
Level Builder can create editable primitives such as:
- cube,
- plane,
- cylinder,
- sphere,
- pyramid.
These are Level Builder mesh sources. They are different from regular built-in scene primitives such as Cube or Plane on a Mesh Renderer.
Selection Modes
| Mode | Use it for |
|---|---|
| Object | Select and transform whole meshes in the Level Builder session |
| Vertex | Select individual vertices |
| Edge | Select shared mesh edges |
| Face | Select triangle faces |
Selection and hidden-face state is stored per open mesh, so switching meshes does not leak face, edge, or vertex selections between assets. Vertex, edge, and face edits should preserve shared topology by default. Use operations such as Extrude, Inset, Merge, Delete, Duplicate, and Subdivide intentionally when you want to change topology.
Transform and Camera Controls
Level Builder separates selection transforms from viewport navigation:
| Action | Shortcut |
|---|---|
| Move | G |
| Rotate | R |
| Scale | S |
| Constrain axis | X, Y, Z, or drag a colored gizmo axis |
| Snap | Hold Ctrl |
| Finer step | Hold Shift |
| Frame selection | F |
| Orbit camera | Right mouse drag |
| Pan camera | Middle mouse drag |
| Ortho front/side/top | Numpad 1, 3, 7 |
| Toggle perspective | Numpad 5 |
If a gizmo is active, dragging it should transform the selection instead of moving the camera.
Placing Meshes in Scenes
Place Mesh in Scene creates a regular scene GameObject with:
- a Mesh Renderer referencing the saved mesh asset,
- an AABB Collider based on the mesh bounds.
The collider is intentionally editable after placement. If the object should block the player, keep or tune the collider. If it is only a trigger or decorative mesh, adjust the Collider accordingly.
The PS1 build validation warns when a Level Builder mesh reaches the runtime path without a Collider, because that object can be walked through.
UV Mapping
The dockable UV Editor follows the active Level Builder mesh. It can operate on the selected faces or the full mesh and provides box and planar projection, automatic unwrap and packing, island selection, texture preview, snapping, numeric transforms, and checks for out-of-range or collapsed UVs.
UVs remain part of the editable .pmsh source and are compiled with the mesh.
Use the dedicated UV Editor page for the complete workflow and
controls.
Saving/exporting also repairs T-junction edges deterministically. Inserted
vertices interpolate existing normals and UVs, so the compiled .msh closes
the raster seam without resetting the authored unwrap. Because repair changes
topology, review the compiled stats and reopen the UV Editor when a warning
reports a dense or unusual result.
PS1 Authoring Rules
Use Level Builder meshes as PS1 content, not as desktop-quality arbitrary models:
- keep meshes low-poly,
- avoid very long triangles,
- avoid tiny sliver faces,
- avoid coplanar duplicate faces and deeply intersecting props,
- subdivide large floors and walls into practical chunks,
- use simple materials,
- keep material slots at or below the PS1 limit of 64,
- validate before saving,
- keep colliders explicit.
For deeper target rules, see PS1 Rendering & Level Authoring and Visibility and Culling.