Editor Overview
The Polygon Engine editor is a Windows application with a dockable, Windows 95-style workspace. Use it to build scenes, import assets, write Lua gameplay, create UI and export PlayStation 1 games.
Main Window
When a project is open, the default layout is organized around these areas:
| Area | Purpose |
|---|---|
| Hierarchy | Scene GameObject tree; create, select, rename, duplicate, delete, and parent GameObjects |
| Scene/Game/UI Views | Edit world geometry, preview gameplay, and author UI canvas elements |
| Inspector | Edit selected GameObject components, selected UI elements, or selected assets |
| Project | Browse scenes, source assets, imported assets, scripts, and build output |
| Console | Read editor, build, runtime, and packaging messages |
| Problems | Review validation issues before running the PS1 build |
| PS1 Budget | Check runtime counts, memory estimates, texture placement, and compatibility warnings |
| VRAM Inspector | Inspect framebuffer, texture-page, texture-footprint, and CLUT placement visually |
| Level Builder | Create reusable mesh assets inside the editor |
| Advanced Scene Authoring | Configure fog, mesh colors, loading/UI, rooms, navigation, and timelines |
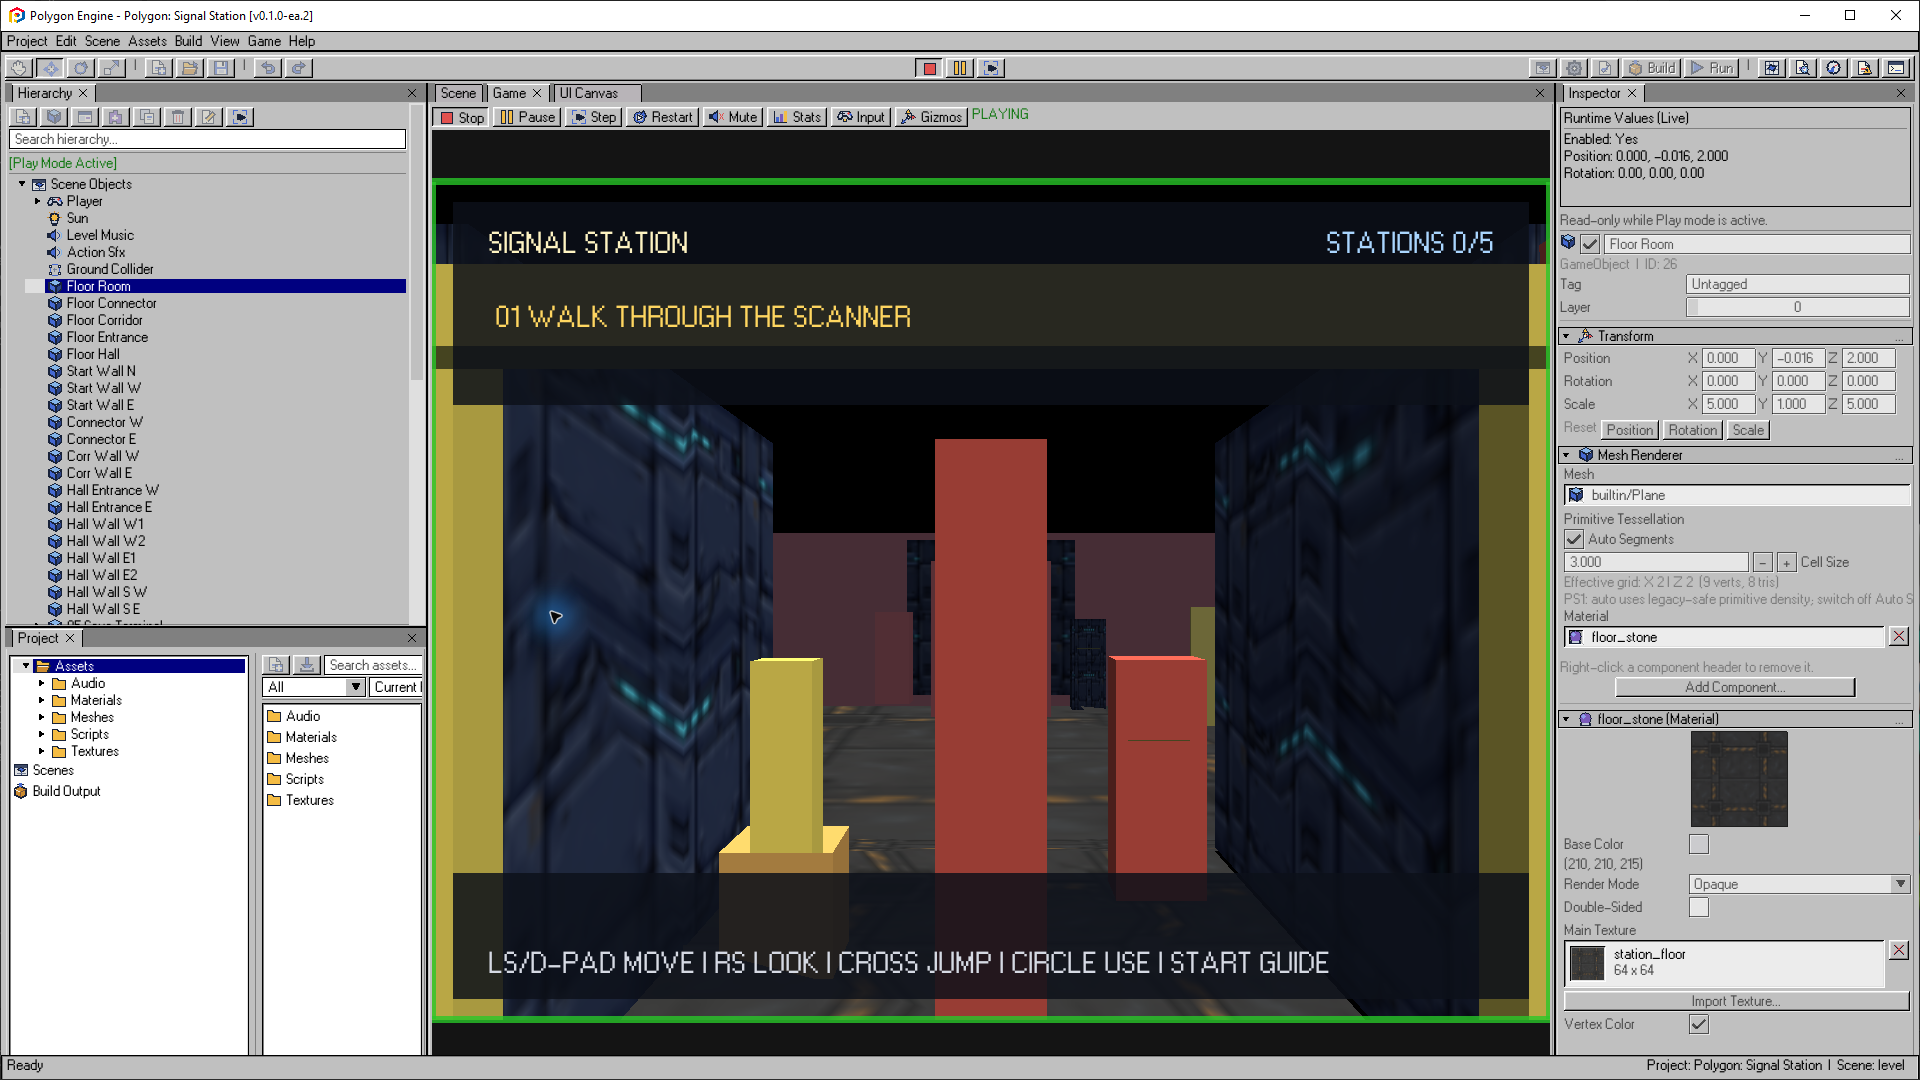
Signal Station in editor Play Mode. Hierarchy and Project are on the left; the selected GameObject and its components appear in the Inspector on the right.
Open the image to view it at full size.Recommended Workflow
- Start from a project - Open an existing project or create a new one. See Quick Start.
- Import assets - Put source models, textures, audio, scripts, and materials in
Assets/. See Workflow: Import. - Configure the project - Set project budgets and build scenes, then configure local tool paths. See Workflow: Configuration.
- Build scenes - Create GameObjects, arrange transforms, and assign components. See Workflow: Scene & GameObjects.
- Create mesh assets when needed - Use Level Builder for reusable PS1-safe meshes. See Level Builder.
- Author gameplay UI - Use UI Canvas elements for menus, HUD, prompts, and buttons. See UI Canvas.
- Author advanced scene systems - Add rooms, navigation, loading presentation, fog, and compact timelines when the scene needs them. See Advanced Scene Authoring.
- Attach behavior and native Components - Combine Lua Behaviour, Collider, Audio Source, player, camera, light, animation, and interaction Components. See Components.
- Validate and build - Run validation, inspect Problems, PS1 Budget, and VRAM Inspector, then build the package. See Build & Export.
Editor Principles
The editor keeps three things visible:
- What the user is editing: selected GameObject, component, asset, mesh, or UI element.
- What the runtime will load: imported assets, build scenes, manifest data, and component values.
- What can fail on PS1: budgets, missing references, colliders, script limits, large surfaces, and risky materials.
Review the visible limits while authoring, then test the exported game in an emulator and on your target hardware.
Related Pages
| Page | When to read it |
|---|---|
| Project Hub | You need to create, register, find, or recover a project listing |
| Panels Reference | You need a panel-by-panel explanation |
| Keyboard Shortcuts | You want faster scene and Level Builder editing |
| Advanced Scene Authoring | You need fog, loading, rooms, navigation, or timelines |
| VRAM Inspector | You need to diagnose texture-page or CLUT placement |
| Build Pipeline | You need to understand generated PS1 output |
| PS1 Constraints | You are optimizing a scene for the target |