2. Build Two Rooms
You will author one subdivided cube asset and reuse it for floors, walls, and the door. This teaches the complete Level Builder path while keeping the level small enough to debug easily.
Create a Reusable Room Block
- Open View > Level Builder.
- Select New under Tools > Create, or Create Primitive in the empty mesh inspector.
- Choose Cube, set Uniform Size to
1, and select Create. - Click inside the Level Builder viewport, then switch to Face mode with
3. - Press
Ato select every face. - Select Subdivide once.
- Review the Level Builder validation panel. Resolve any error before saving.
- Scroll down the left Tools panel to Asset, then select Save.
In Save Mesh Asset, enter
RoomBlockand select Save Asset. - Select Place in the same Asset section. In Place Mesh in Scene, keep Gameplay Mode set to Blocking and Collider Shape set to AABB, then select Place Mesh.
The saved source lives at Assets/Meshes/RoomBlock.pmsh; the scene GameObject
references its imported mesh GUID. Place Mesh in Scene also creates an AABB
Collider, so the first placed block is immediately usable as solid geometry.
Subdivision is a starting point, not proof that every scaled wall meets the post-bake budget. Validate the final scene at its actual transforms. Imported RoomBlock meshes do not automatically receive all the built-in primitive bake and chunking operations. If close-camera or packet tests fail, split long pieces or revise their topology and recheck collision.
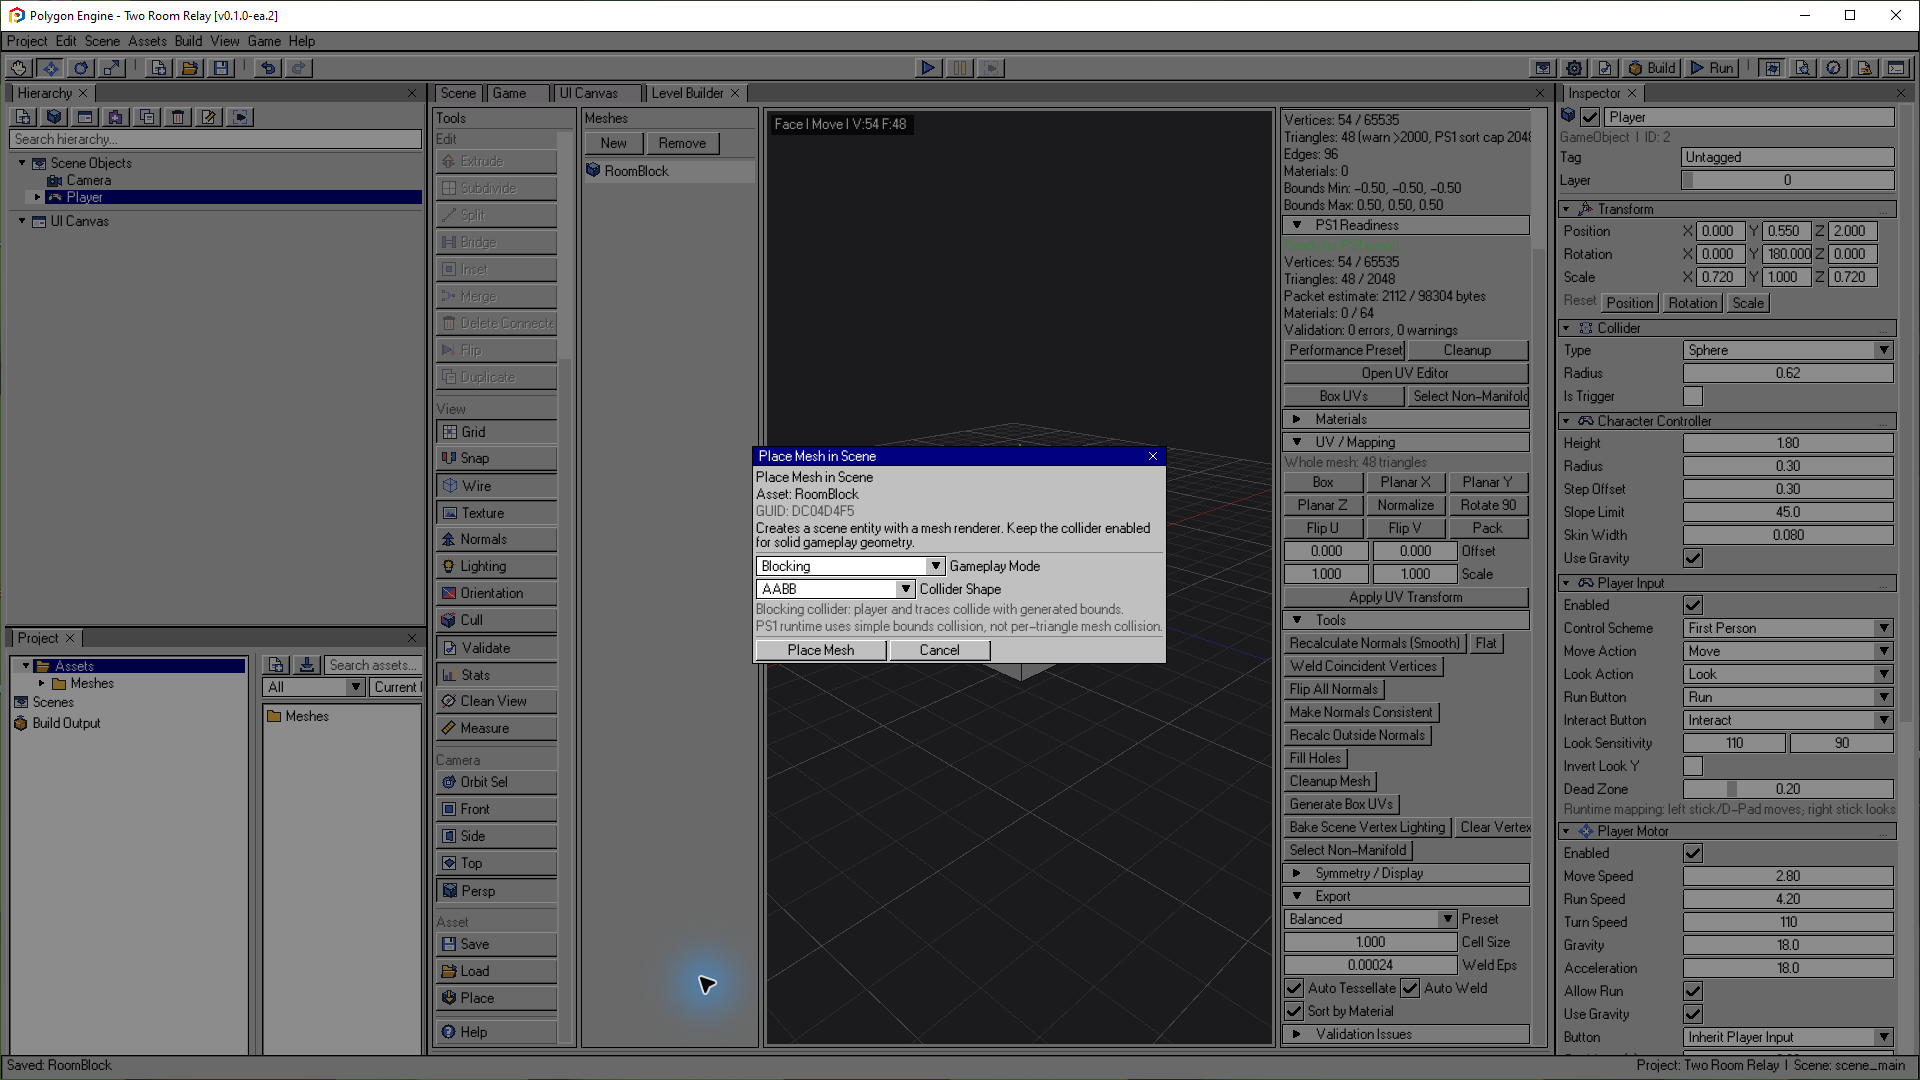
The subdivided RoomBlock has 48 triangles. Save and Place are in the Asset section at the bottom of the left Tools panel. Place it with a blocking AABB collider for the floors, walls and door.
Open the image to view it at full size.Assemble the Level
Return to the Scene tab. Rename the first placed GameObject Floor A in the Inspector. Duplicate it with Ctrl+D, then use
the following transforms to assemble the complete level. Every row uses the
same RoomBlock mesh and keeps its generated Collider.
| GameObject | Position X/Y/Z | Scale X/Y/Z |
|---|---|---|
| Floor A | 0, -0.1, 0 | 6, 0.2, 6 |
| Floor B | 0, -0.1, -6 | 6, 0.2, 6 |
| Room A Left Wall | -3, 1.5, 0 | 0.2, 3, 6 |
| Room A Right Wall | 3, 1.5, 0 | 0.2, 3, 6 |
| Room A Back Wall | 0, 1.5, 3 | 6, 3, 0.2 |
| Divider Left | -2, 1.5, -3 | 2, 3, 0.2 |
| Divider Right | 2, 1.5, -3 | 2, 3, 0.2 |
| Room B Left Wall | -3, 1.5, -6 | 0.2, 3, 6 |
| Room B Right Wall | 3, 1.5, -6 | 0.2, 3, 6 |
| Room B Far Wall | 0, 1.5, -9 | 6, 3, 0.2 |
| Door | 0, 1.2, -3 | 1.8, 2.4, 0.25 |
The two divider pieces leave a two-unit opening around the origin. Door
occupies that opening until the trigger disables it.
Inspect Collision Before Gameplay
Select several floor and wall GameObjects and confirm:
- Mesh Renderer references
RoomBlock; - Collider exists;
- Is Trigger is disabled;
- the collider follows the visible scaled block;
- no two floor surfaces occupy the same plane.
Avoid adding a second floor at the same height. Coplanar or nearly coplanar surfaces compete in the PS1 ordering table and can appear to flicker or draw in the wrong order.
Optional Material Pass
Use three flat-color materials to make the level easier to read. In the Project panel, select Assets, open the create menu and choose Material. Rename each new material using its context menu, then set Base Color in its Inspector:
| Material | Base Color (RGB) | Assign to |
|---|---|---|
Floor | 82, 126, 134 | Floor A and Floor B |
Walls | 192, 174, 132 | All eight wall and divider pieces |
Door | 194, 124, 65 | Door |
Keep Render Mode Opaque, Double-Sided disabled and Vertex Color enabled. Select each GameObject and choose the material in Mesh Renderer > Material. These are the colors used in the tutorial screenshots. Textures are not required for the room shell.
Set the Scene Lighting
Select Scene Objects in the Hierarchy to show Scene Settings in the
Inspector. Click the Ambient Light color, enter hexadecimal FFFFFF
(RGB 255, 255, 255), then click outside the picker. Keep Background Color
at its default RGB 52, 52, 52 and GPU Dithering enabled.
This tutorial uses bright, even ambient light so the flat-color rooms are easy
to read. You can add directional lights and reduce ambient light later. Check
the result in the Game tab and save with Ctrl+S.
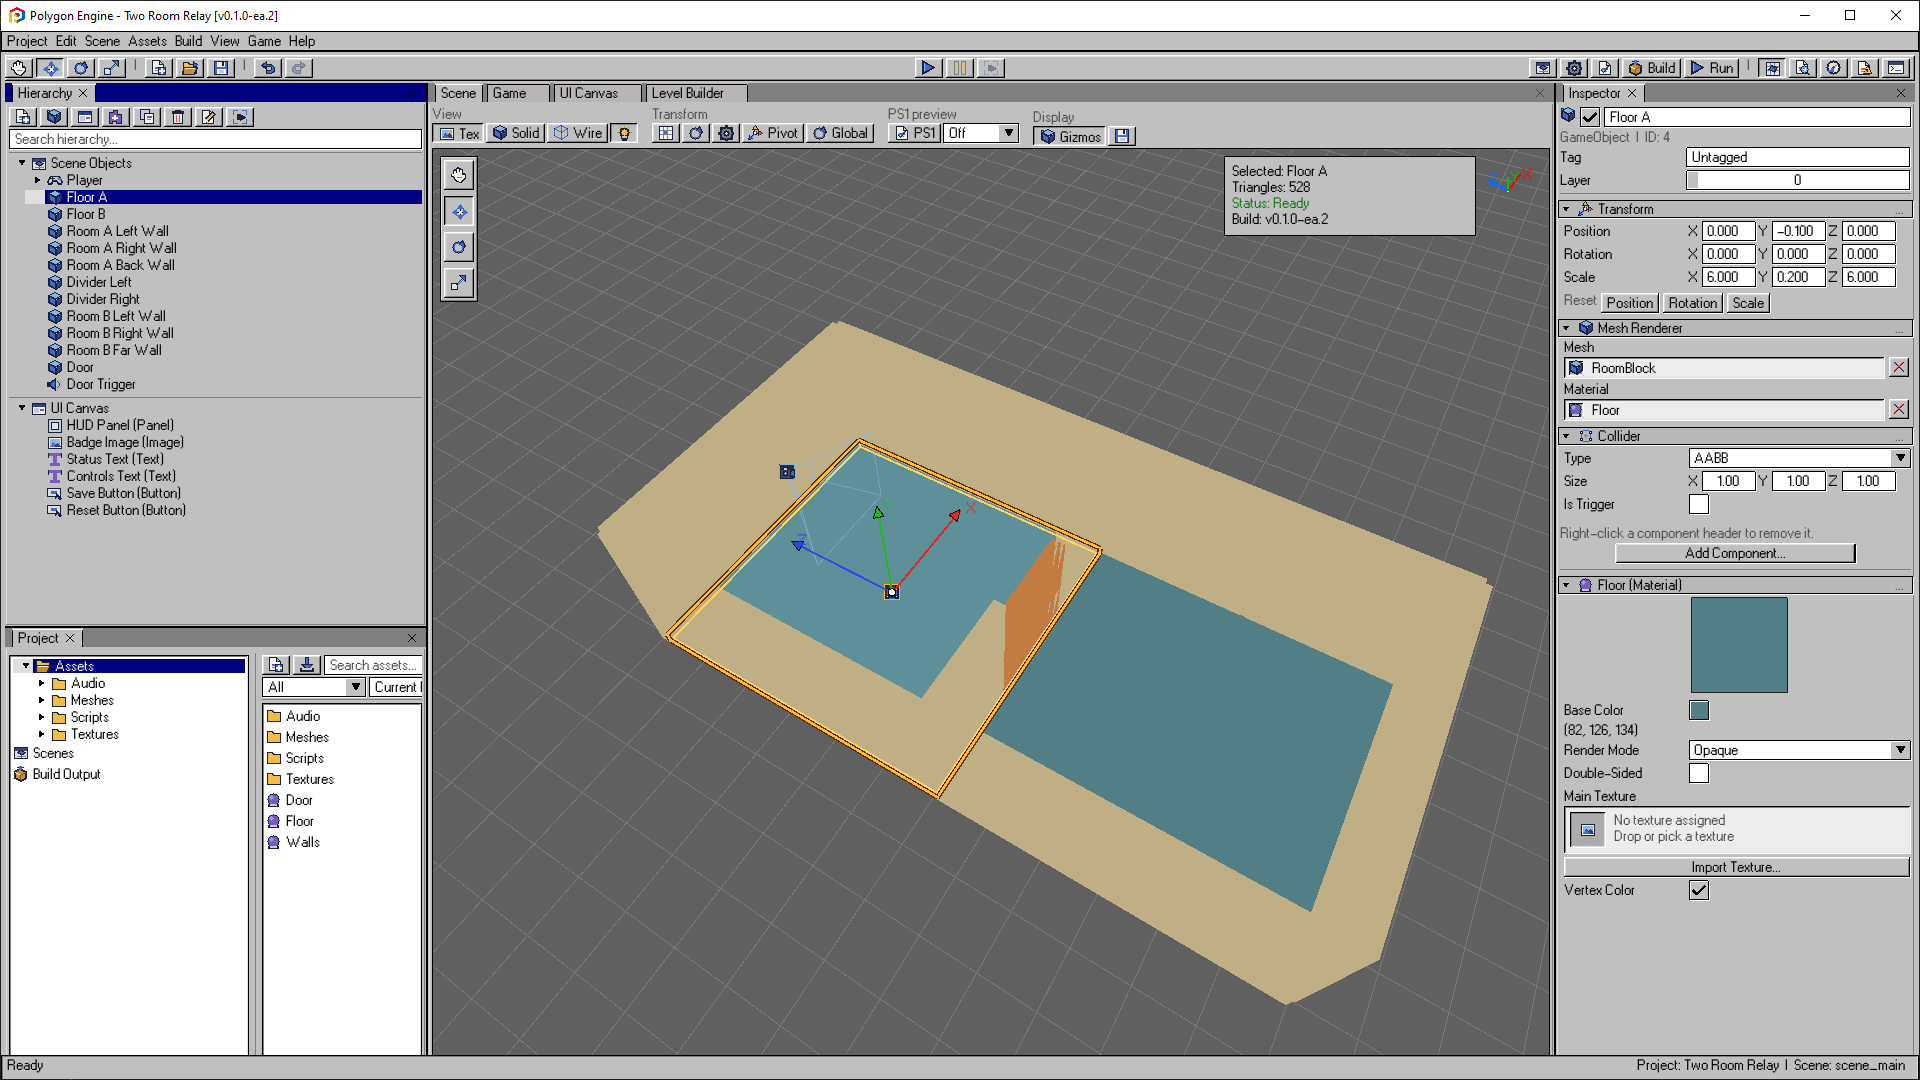
Room A and Room B share a doorway. Floor A uses RoomBlock, the Floor material and a solid AABB collider; its Transform scales the mesh and collider together.
Open the image to view it at full size.Checkpoint 2
Press Ctrl+S and enter Play Mode. Confirm:
- the player lands on
Floor Aand remains above it; - the player cannot walk through the outer walls;
- the door blocks the opening;
- no face disappears when the camera approaches a wall;
- there is no visible z-fighting between floor pieces.
If collision does not match a visible block, select that GameObject and tune its Collider before continuing. Next: Create the Door Trigger and Lua.