5. Test and Build
The project is feature-complete. This chapter turns it into a repeatable acceptance test and then produces the PS1 disc image.
Save and Configure the Build
- Press
Ctrl+S. - Open Build > Build Settings....
- Add
Scenes/scene_main.jsonto Scenes In Build if it is not already present. - Set it as the Startup Scene.
- Save the build settings.
This tutorial uses one scene, so any other startup path is an error.
Run the Editor Acceptance Pass
Run these commands in order:
- Build > Validate Project
- Build > Show PS1 Budget
- Build > Run Production Acceptance
Do not ignore hard errors. For this project, check especially:
- exactly one enabled player controller and one default Spawn Point;
- an enabled playable camera;
- Colliders on every Level Builder room piece;
Door Triggermarked as a trigger;- exact, unique Player Name and Door Name script properties;
- imported texture and audio GUIDs;
- valid UI button target functions;
- a unique memory-card file ID;
- no VRAM, SPU RAM, packet, Lua, or runtime-memory overflow.
Complete Play Mode Matrix
Use this table as a regression checklist whenever Polygon Engine changes.
| Test | Expected result |
|---|---|
| Start Play Mode | Player spawns in Room A at the correct height |
| Left stick / D-Pad | Player moves and collides with floor and walls |
| Right stick | First-person camera looks around on an analog controller |
| Approach geometry | Walls remain visible without overlapping faces or severe seams |
| Enter Door Trigger | Door disappears, sound plays, and status confirms save |
| Walk into Room B | Player passes through the opened doorway |
| Press Square | Saved player position is restored |
| Submit Save Button | Button callback saves and plays audio |
| Submit Reset Button | Tutorial keys are saved as cleared, player returns to Room A, and door closes |
| Stop and restart Play Mode | Editor save mirror restores the expected state |
If a failure appears here but not in the PS1 build, report it as an editor Play Mode preview mismatch. If it appears only in DuckStation, keep the generated build logs and check PS1 budgets and controller configuration first.
Build and Run in DuckStation
Configure DuckStation before launching:
- Map Port 1 to an Analog Controller / DualShock.
- Enable automatic analog mode, or press the mapped Analog/Guide button after boot if the pad starts in digital mode.
- Attach a formatted memory card to Port 1.
If you use a keyboard, open Settings > Controllers in DuckStation, select
Controller Port 1, then choose Automatic Mapping > Keyboard. The default
mapping uses WASD for the left stick, TFGH for the right stick, K for Cross,
J for Square and the arrow keys for the D-Pad. These are DuckStation bindings;
the editor has its own keyboard controls.
Automatic Mapping does not necessarily assign the Analog mode button.
Click that binding and assign an unused key such as P. Close the
controller settings, relaunch the CUE if you changed bindings while the game
was running, and press P after boot if the right stick does not
respond. With the
runtime overlay
enabled, analog:1 confirms analog input; analog:0 means
digital mode. For a physical controller, select its detected device and assign
its Analog mode button as needed.
Check that audio is not muted in the emulator. Set Settings > Graphics > Display > Crop Mode to None when checking the complete 320 x 240 canvas, including the buttons near the bottom edge. The screenshot below uses a 1920 x 1080 window; the game keeps its original aspect ratio.
Before rebuilding, close the running DuckStation game so it releases the disc image. Otherwise Windows can prevent the packager from replacing files.
Then select Build > Build & Run PS1. Polygon Engine validates, cooks, packages, and opens the generated CUE. If automatic launch is unavailable, use Build PS1 (Release) and open:
Build/ps1/package/TWO_ROOM_RELAY.cue
Open the CUE, not the ISO, so the emulator uses the packaged disc layout.
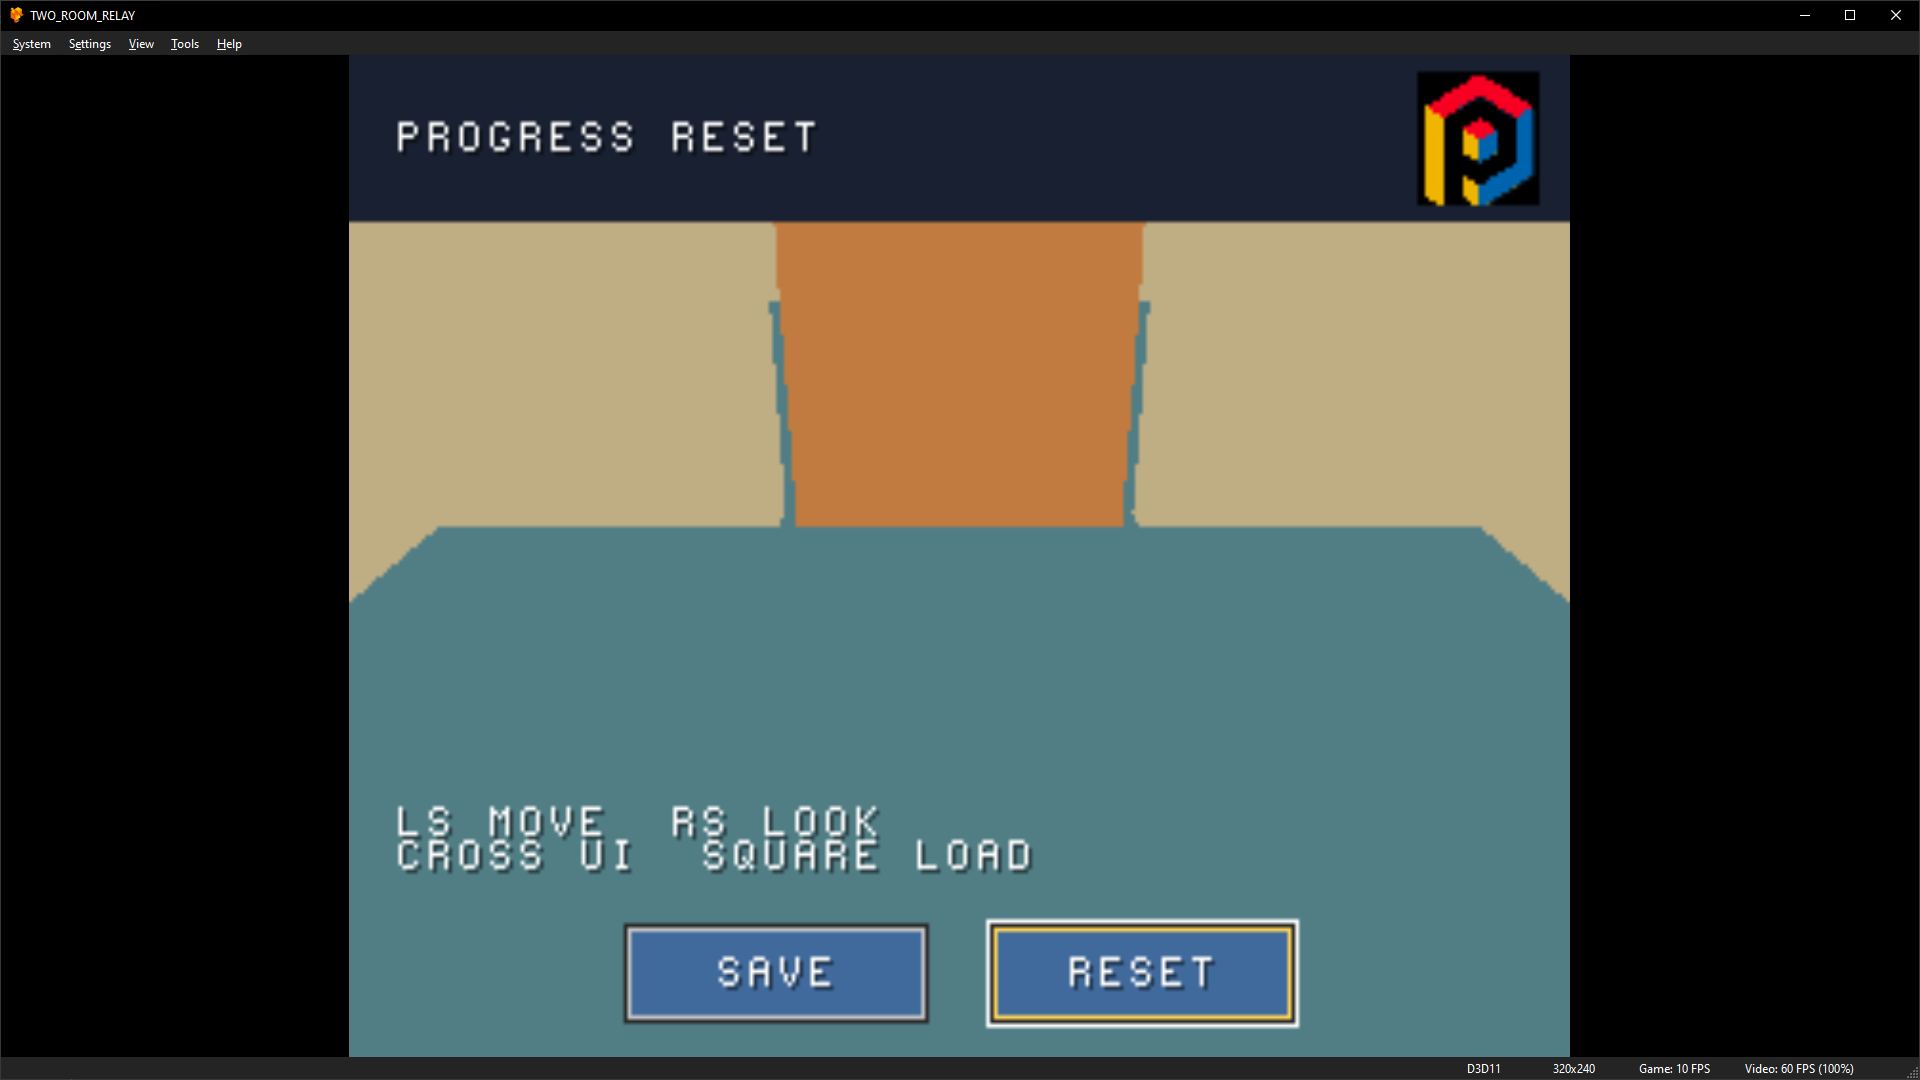
After Reset, the player is back in Room A and the door is closed. The exported badge, status text, controls and both buttons are visible. The camera is tilted toward the floor to show the room and HUD together.
Open the image to view it at full size.On each exported-game start, expect the Polygon Engine logo on black for four seconds, with a fade in and fade out, before the tutorial loads. The logo is mandatory and does not appear during editor Play Mode. It should not repeat when the game changes scenes.
Keep optional disc boot data empty for the default tutorial build. If your target loader requires your own authorized data, configure it separately as described in BIOS, Disc Boot Data, and Startup Splash. Never select a BIOS in the engine's disc boot data field.
Check the Game Frame Rate
Use the runtime overlay while walking through both rooms and looking along walls. DuckStation's Video: 60 FPS (100%) shows the NTSC output rate and emulation speed; it does not mean the game updates at 60 FPS. Check its Game counter and the runtime's VSync intervals. A frame spanning four NTSC VSyncs is approximately 15 FPS.
The budget check establishes that the content fits. It does not guarantee a target frame rate. Close views with extensive clipping and controller collision work can be more expensive than the scene's triangle count suggests.
Validate the Real Memory-Card Cycle
Editor Play Mode uses a JSON mirror; this pass exercises the PS1 save format inside DuckStation. It does not validate a physical memory card or power loss.
- Use
Reset Buttonto start from a closed door. - Walk into the trigger and wait for
DOOR OPEN - CHECKPOINT SAVED. - Reset or power-cycle the emulated console.
- Boot the same CUE with the same Port 1 card attached.
- Confirm the door starts open.
- Press Square and confirm the saved position loads.
- Use
Reset Button, reboot again, and confirm the door starts closed.
Do not remove the memory card or close the emulator while a write is in progress.
Common Failures
| Symptom | Check |
|---|---|
| Player falls through the floor | Floor Collider exists, is not a trigger, and matches the scaled mesh |
| Door never opens | Trigger size/position, Is Trigger, Player Name, and OnTriggerEnter |
| Door draws over a wall | Door is inside the doorway rather than coplanar with a divider piece |
| Button does nothing | Interactable, Target Entity Door Trigger, and exact function name |
| Audio does not play | Audio Source clip, Play On Start disabled, resident VAG import, SPU budget |
SAVE FAILED | Port 1 card availability, file ID, entry lengths, and SaveData.GetLastError() |
| Right stick does nothing | DuckStation pad type and analog mode |
| Build cannot package | Close DuckStation if the package is locked; otherwise check Setup Wizard tool status and mkpsxiso path |
Where to Go Next
You now have a minimal vertical slice rather than an isolated feature demo. Extend it one system at a time:
- replace the instant door with a Transform Animator;
- add an Interactable console instead of an automatic trigger;
- import a custom 3D model and material;
- add particles through the ParticleSystem API;
- add a second scene and load it with SceneManager;
- use streaming CD-XA music for a longer soundtrack;
- compare the result with the bundled First Person Tour.
Keep the final matrix as a small acceptance project for future engine releases.
Failure and retry matrix
Use View > Save Data Simulator on a disposable tutorial copy. Restore Failure Simulation: None after each test.
| Test | Required result |
|---|---|
| Card absent/full while entering the trigger | Door opens for gameplay; status says SAVE FAILED; saved preferences are not replaced with a partial checkpoint |
| Restore card availability, submit Save | Current position and open door persist; reboot/restart and load to confirm |
| Corrupt/absent card while pressing Square | LOAD FAILED; player position and door state stay unchanged |
| Card full while submitting Reset | RESET FAILED; player and door stay unchanged; previous tutorial preferences remain available |
| Restore card availability, retry Reset | PROGRESS RESET; player returns to Room A and door closes; reboot confirms reset |
| Save before opening the door | Closed-door checkpoint loads as closed; later successful trigger save records open |
| Missing/renamed Player or Door | Setup error identifies the name binding; no save operation is treated as successful |
Repeat normal save, load, reset, and retry flows in the packaged game. The Save Data Simulator helps you test failure messages while developing; also test your final game on its target hardware.